Secure external access to HomeAssistant with Cloudflare mTLS

This method allows you to access your Home Assistant installation from anywhere but only on specific devices using mTLS (mutual TLS). This not only works in browsers but also for the Mobile App.
This is a rough guide as this is the result of many hours of trial and error and mainly from memory.
Cloudflared addon
If you already have a Cloudflare tunnel set up, you can add that with your selected domain/subdomain.
If you haven't done this already or want to have a dedicated tunnel to Home Assistant, I recommend following the official addon guide found here: https://github.com/brenner-tobias/addon-cloudflared/wiki/How-tos
This is the method I used.
Setting up mTLS
This section is assuming you've already set up a Cloudflare Tunnel above to access HA, for this guide I've used hass.yourdomain.com as the example, this should be replaced with your own domain/subdomain.
Start by logging into the standard Cloudflare dashboard (not the Zero Trust)
You'll want to go to SSL/TLS -> Client Certificates on the domain you'll be using to access.
Before you do anything else, under the Client Certificates title, there's a small bit for Hosts - make sure you add your hass.yourdomain.com here!
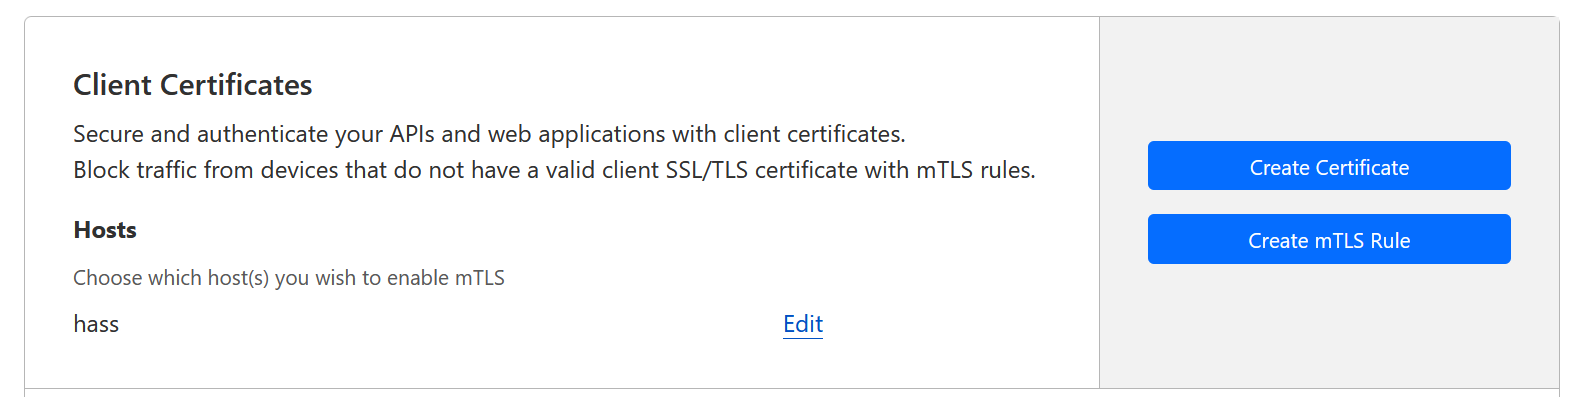
From here, click "Create Certificate" and use the PEM option.
Save the certificate as hass.crt and the private key as hass.key
You'll now need to create a PKSC2 certificate from these using the following command:
openssl pkcs12 -export -out hass.pfx -inkey hass.key -in hass.crtThis will ask you to enter a password for the certficiate - make sure you remember this as you'll need it to install the certificate on the clients
Note: If you're going to be using the certificate on an older Android device, you may need to include -legacy.
For example, my Pixel 6 Pro worked fine without but a Huawei P30 Pro didn't. If you get an incorrect password notification, try the legacy option.
Now you have the certificate you're ready to put it on all the devices you want to access, for Android, you'll want to install it for VPN and Apps.
Firewall setup
Now that the devices you want to access have the certificate, it's time to lock down all access to your HA without it.
On that same page where you generated the certificate (SSL/TLS -> Client certificates) there's an option "Create mTLS rule" click this.
This will take you to a prepopulated rule, though you will need to make some changes.
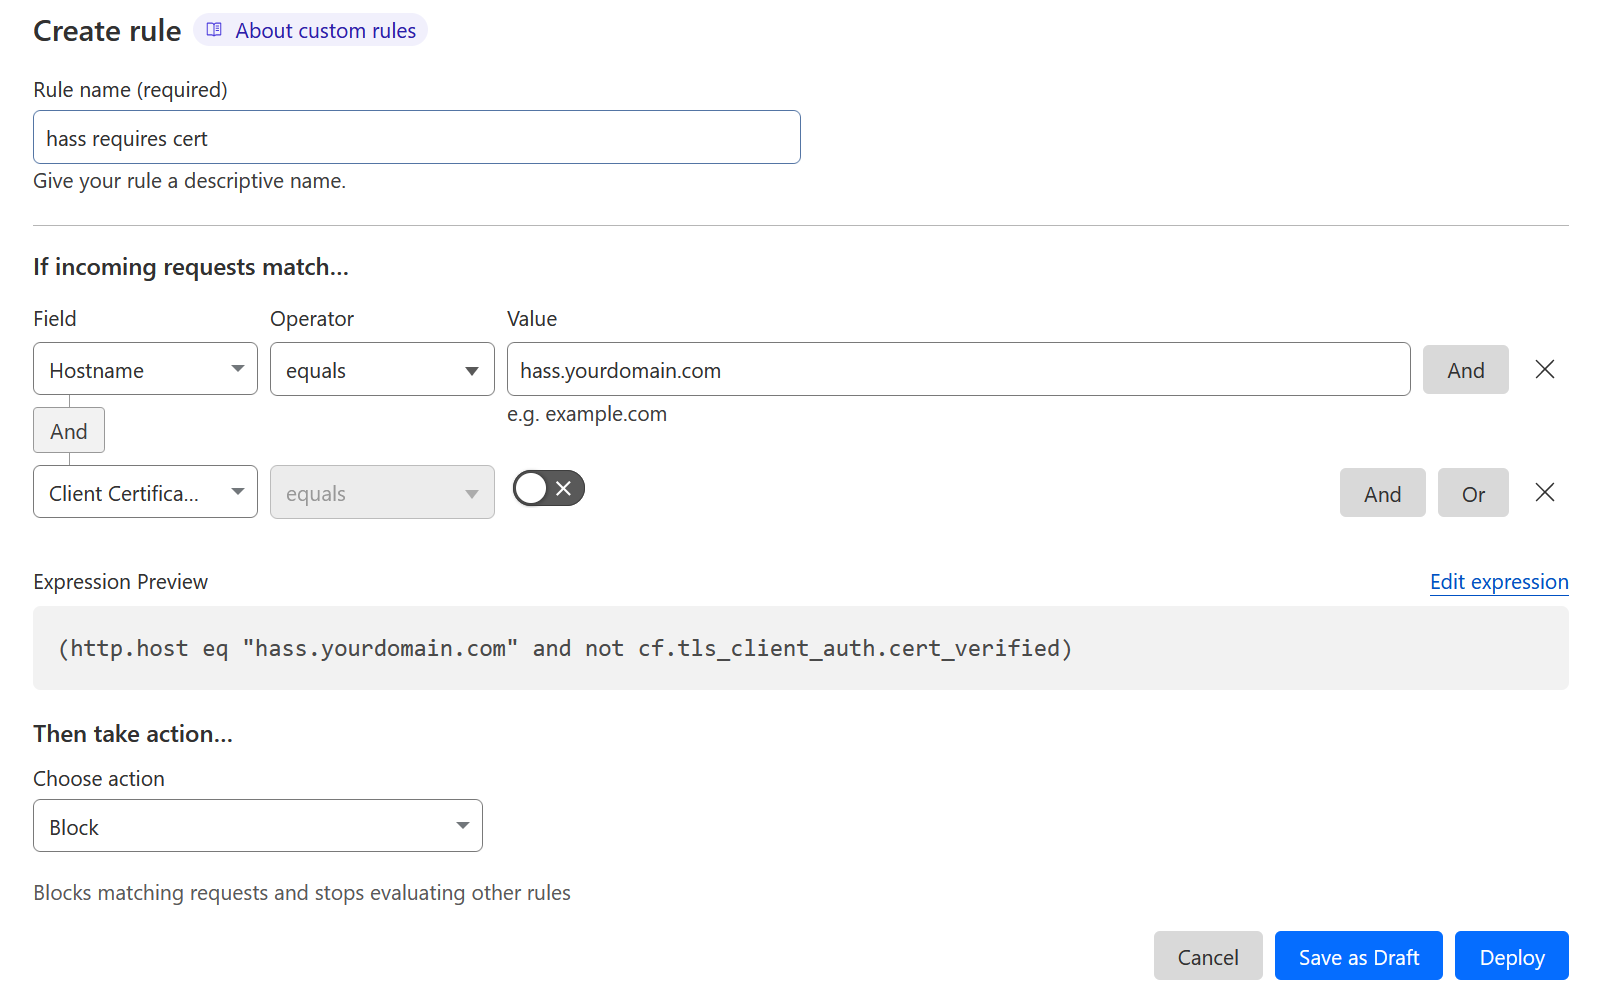
Start by adding a new "and" set to Hostname equals hass.yourdomain.com where this is the domain/subdomain you've set up to access Home Assistant via your tunnel.
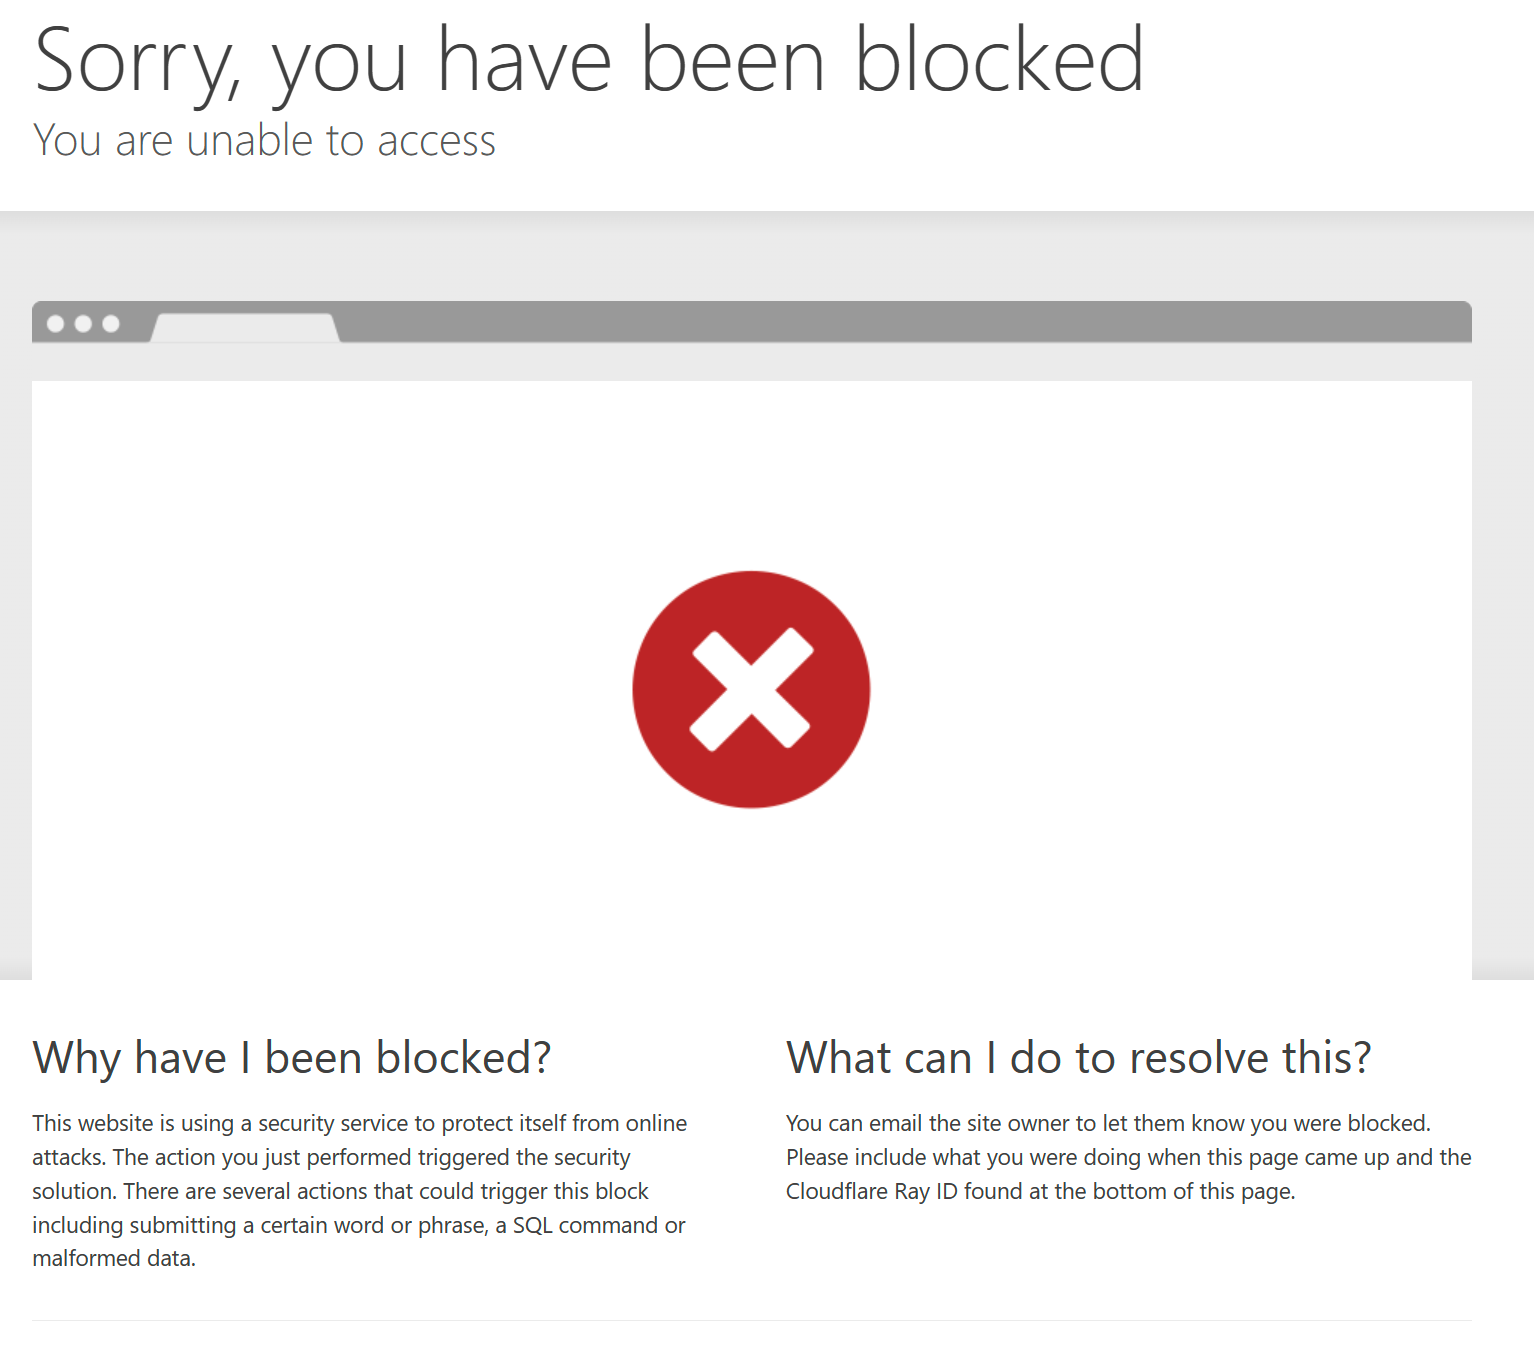
Make sure the action is Block - the rule is if the hostname is your specified URL and the certificate is not valid.
If you now deploy this and access the URL of your Home Assistant, you'll be presented with a big blocked page.
However if you access on a device with the certiciate installed, you'll be prompted to select the certificate and then granted access.
From here you can set up the Home Assistant app as usual, it will also prompt for the certificate on first connection. Enjoy secure access to your HA instance!